Step 1 of 5Customers
The Customers list
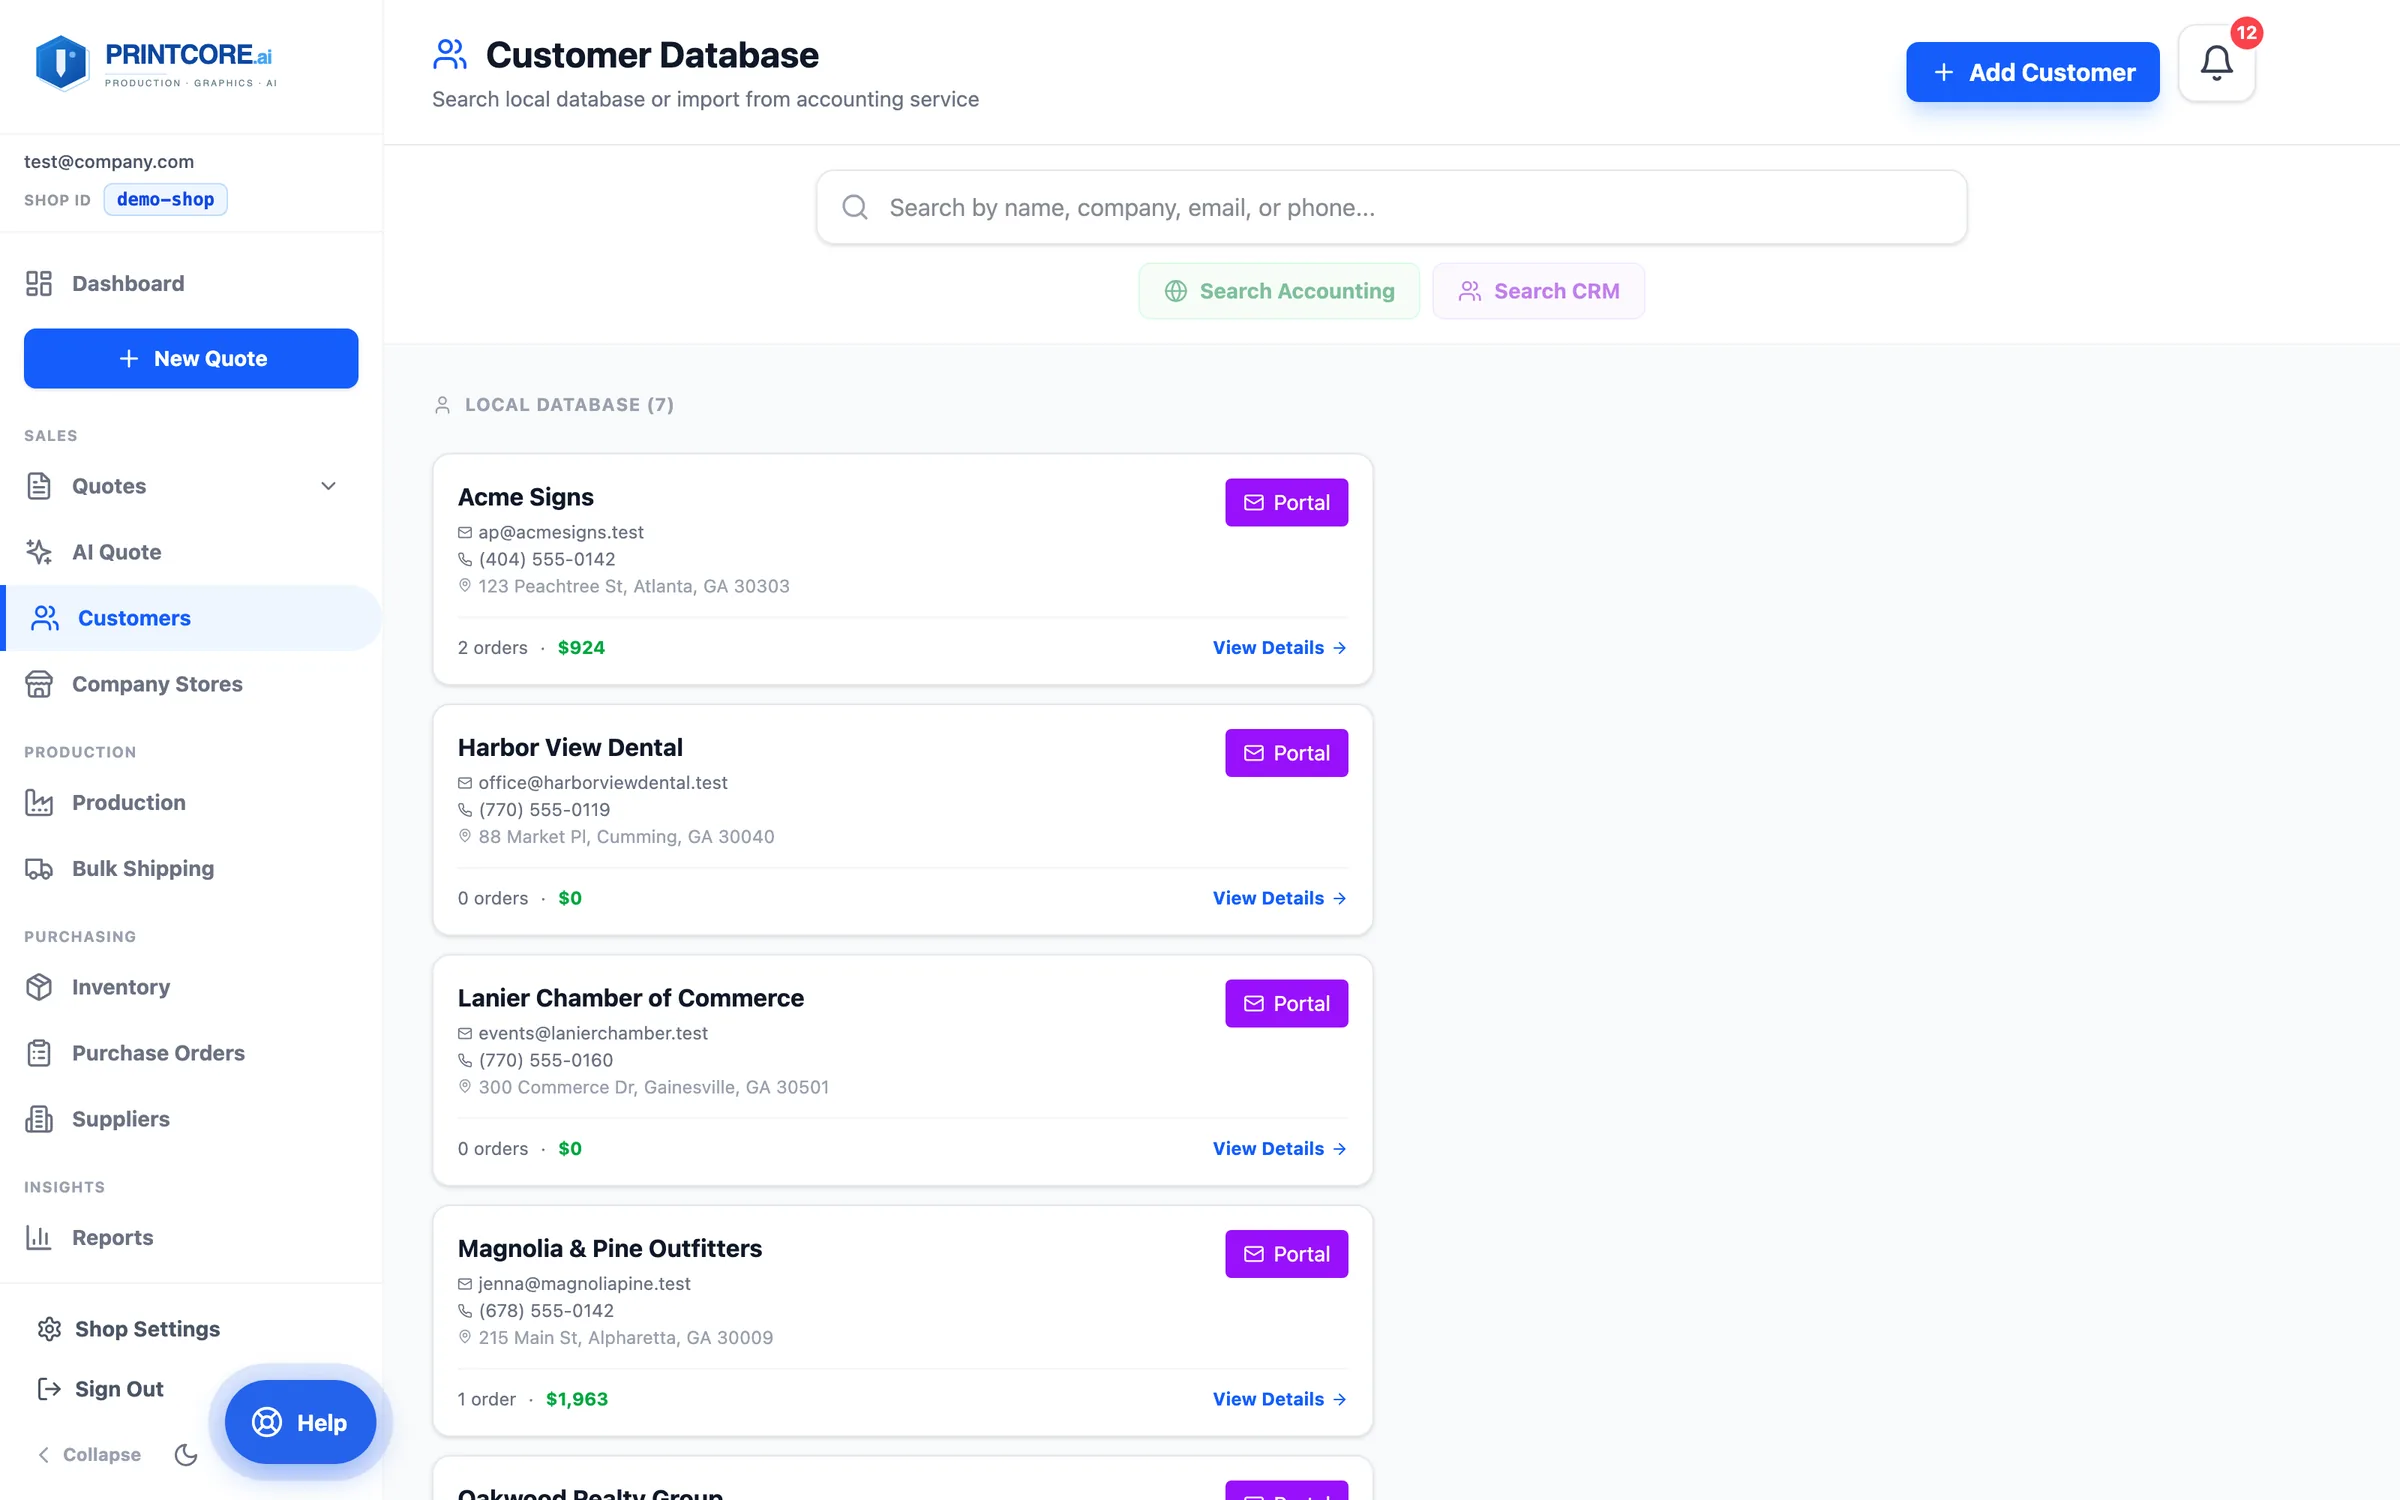
Every customer your shop has worked with. Each row shows order count and lifetime value ("12 orders · $9,786"), and the search box is front and center.
app.printcore.ai/customers
What to do
Click Customers in the side menu (Sales group). Search by name, company, or email.
Why it matters
You can spot your top customers, and the ones who've gone quiet, in 5 seconds.
Step 2 of 5Customers
Open a customer
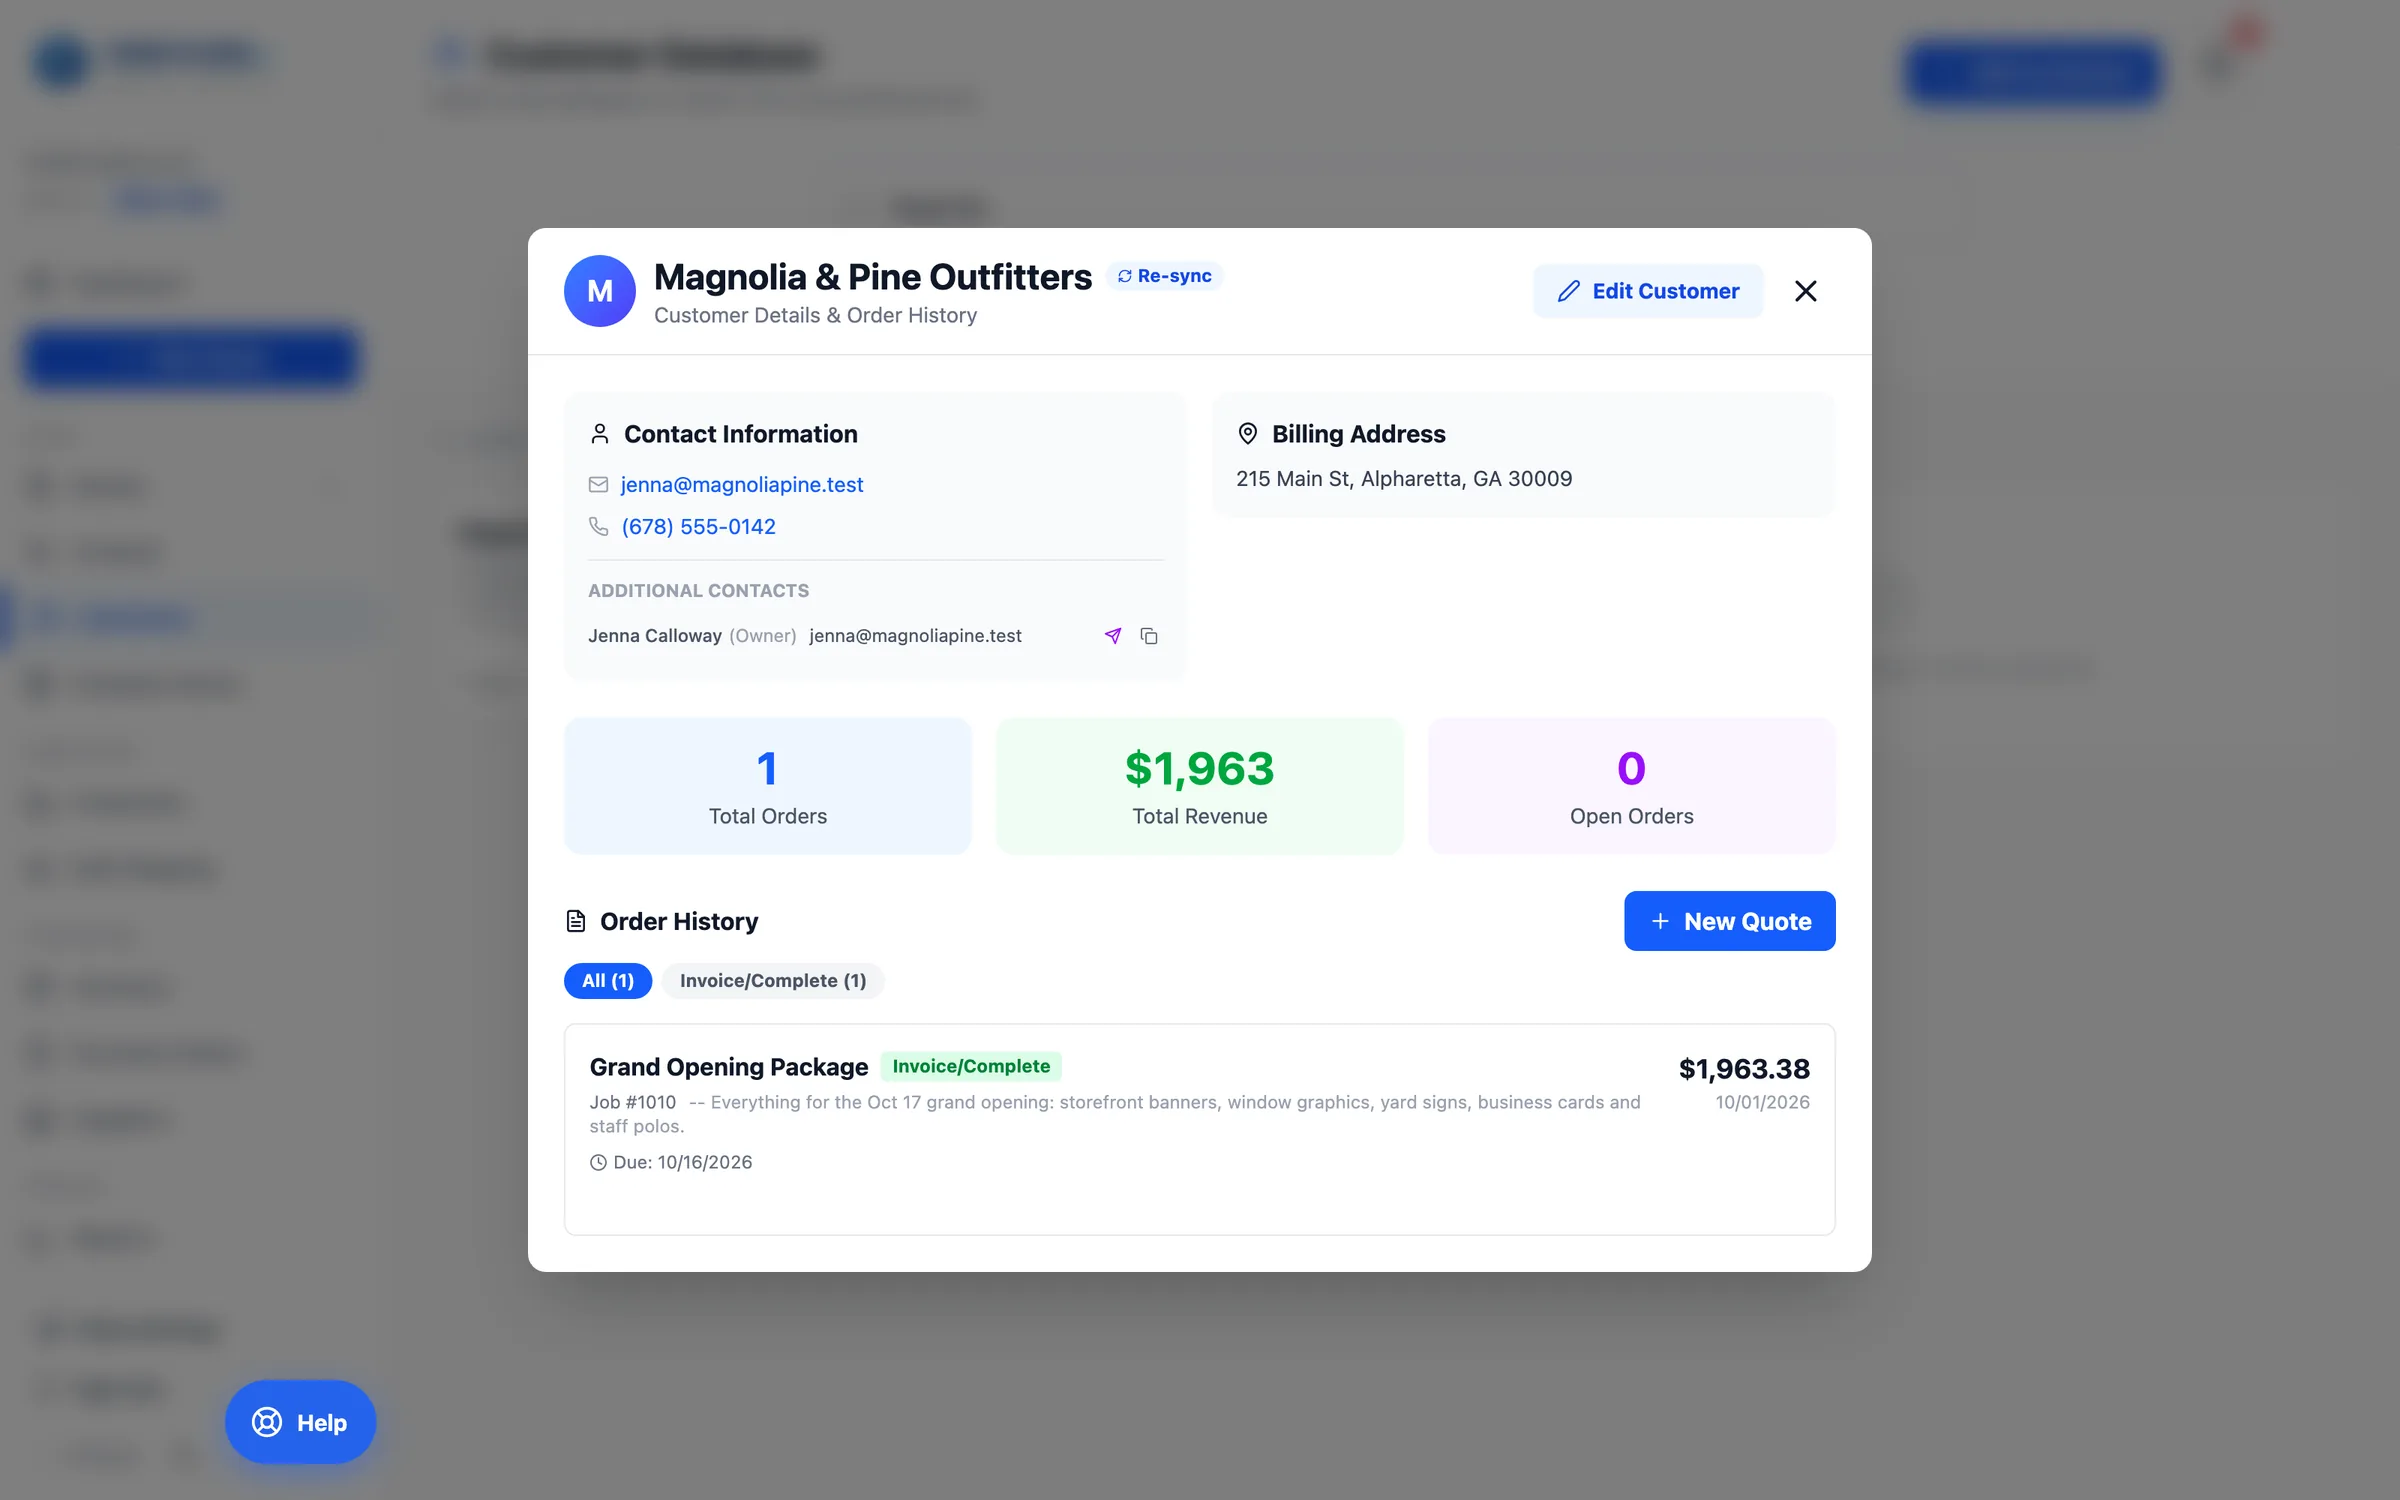
Click View Details on a customer card to see the full record — contacts, addresses, totals (orders, revenue, open orders), and the complete order history, filterable by stage.
app.printcore.ai/customers
What to do
Click a customer. Hit New Quote to start a quote for them, or Edit Customer to update details. Contacts can be added, removed, or marked primary; the whole customer can be deleted from the edit form.
Why it matters
Every interaction with this customer — every quote, every job, all the running totals — is in one place.
Step 3 of 5Customers
Link to your accounting software
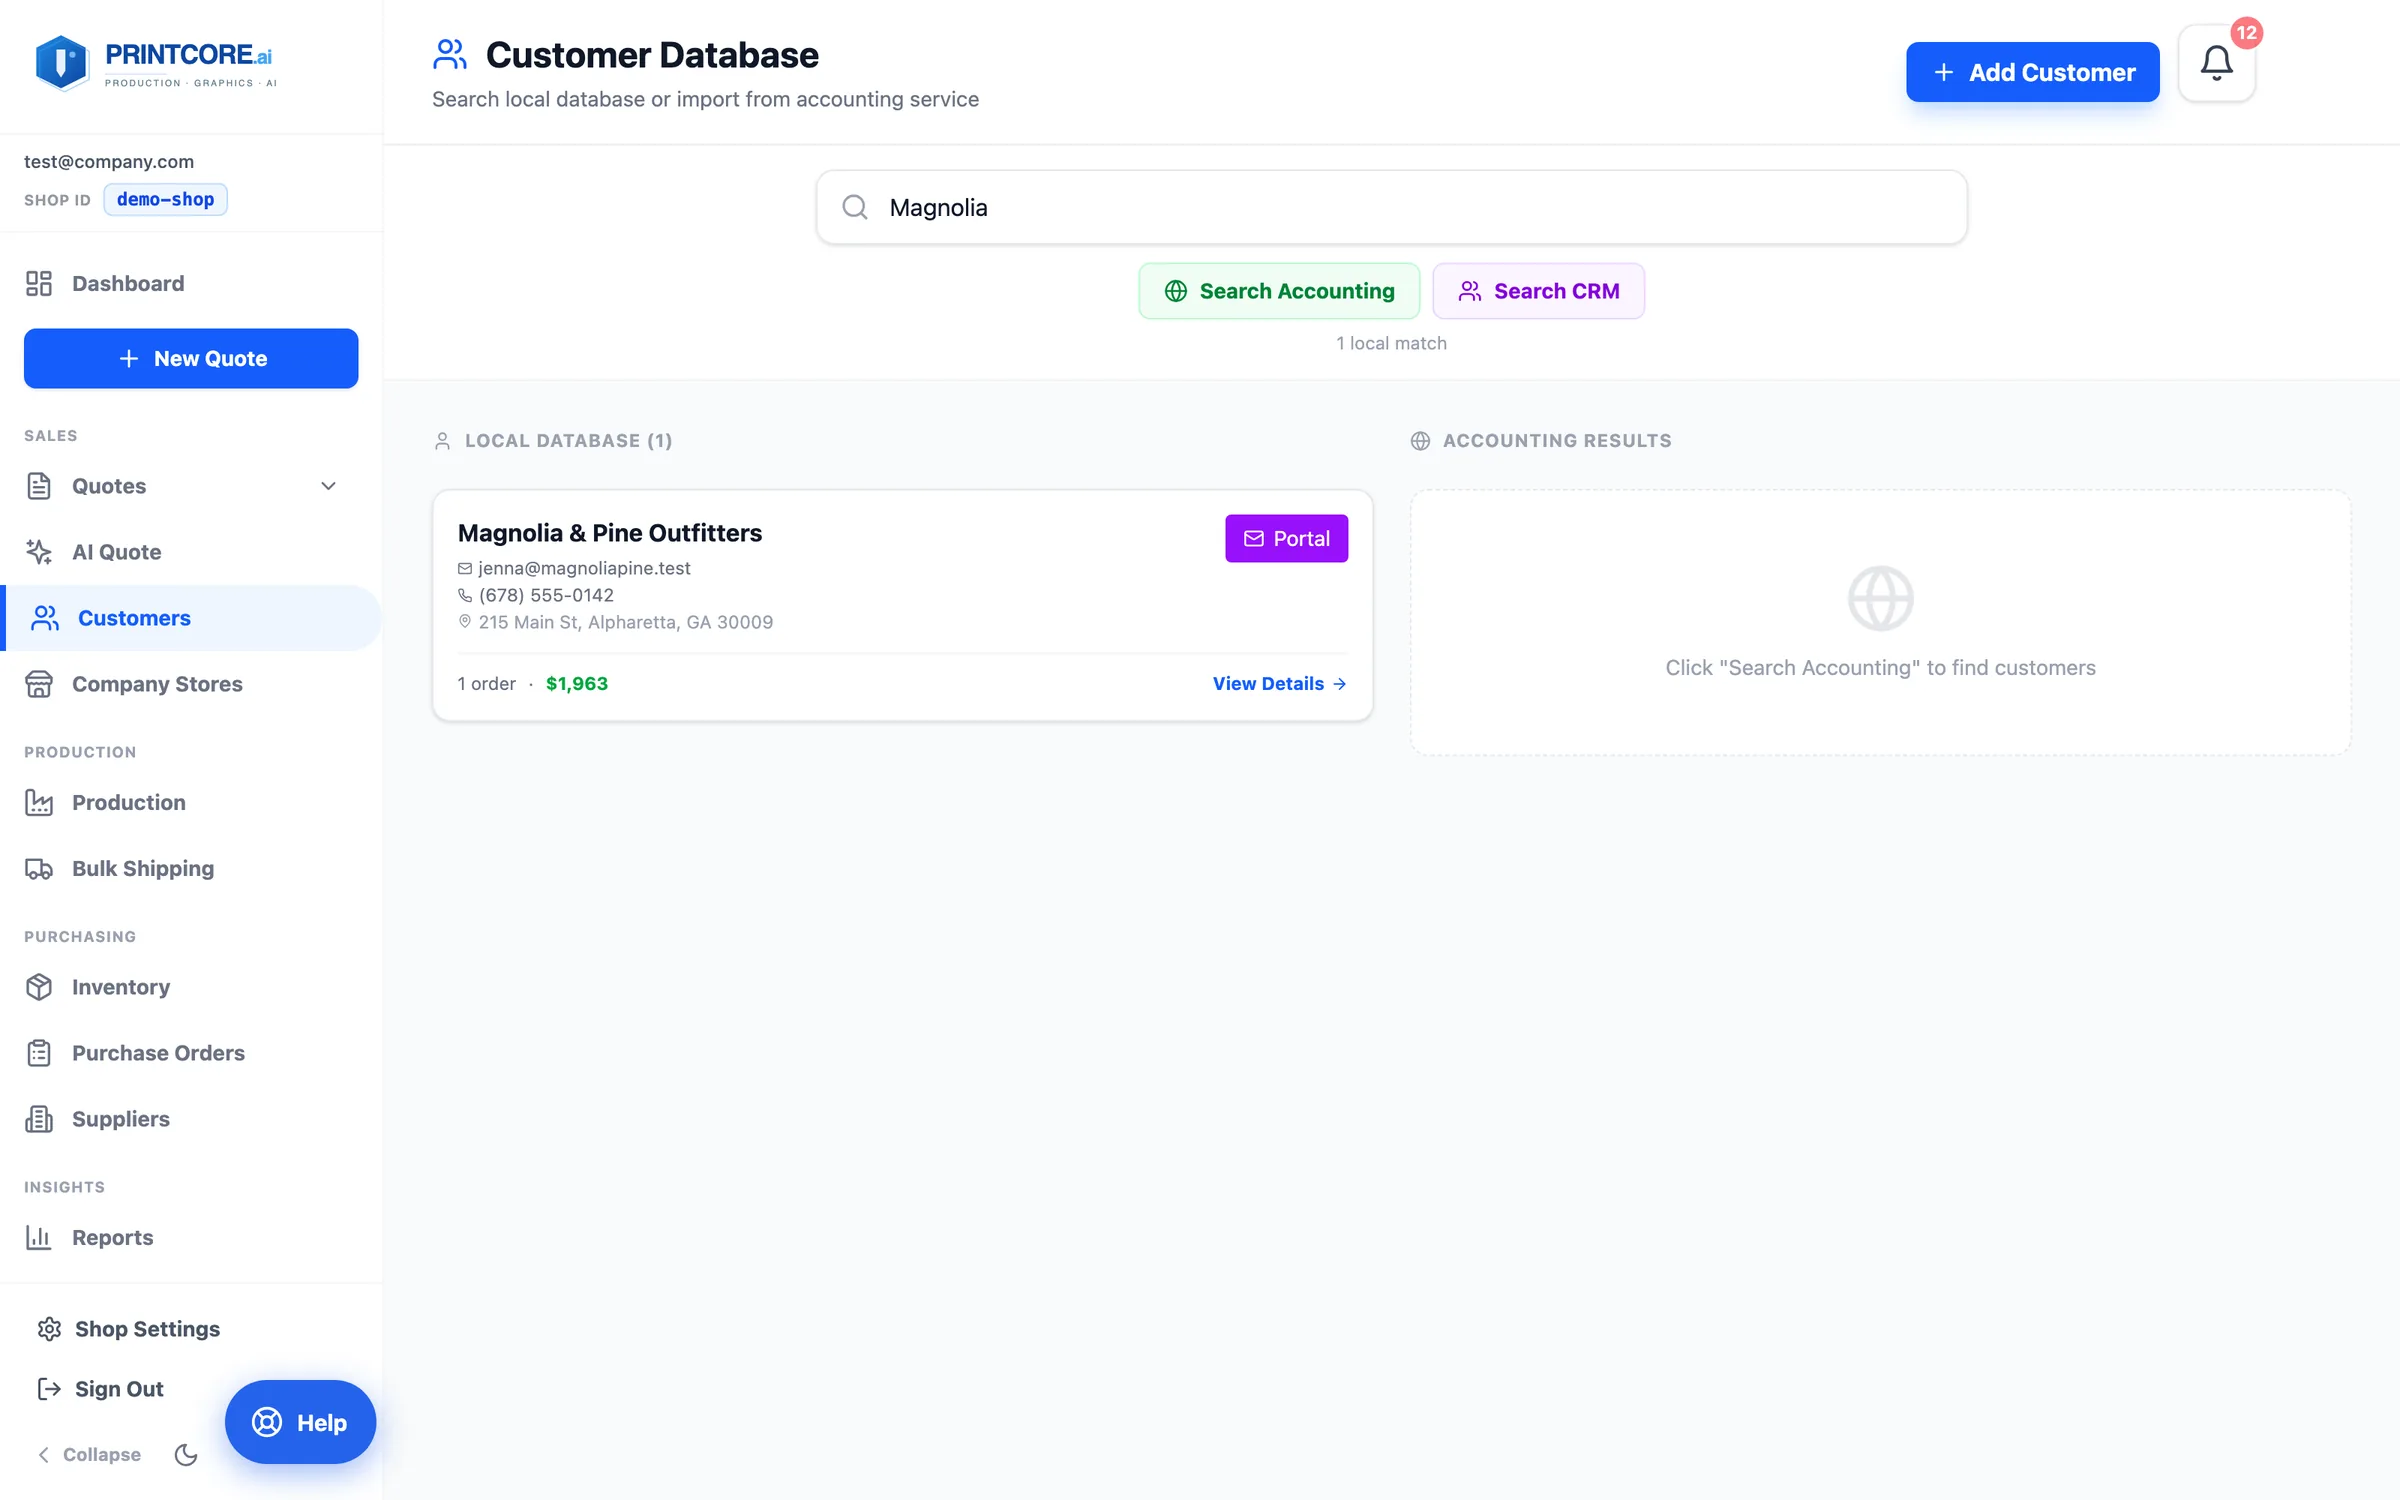
From the customer search, click Search Accounting to find the matching record in QuickBooks, Xero, Sage, NetSuite, or FreshBooks and link it in one click. Linked customers sync both ways, and their imported invoice history feeds AI pricing.
app.printcore.ai/customers
What to do
Type a name, click Search Accounting, and hit Import or Link on the match. The record shows a sync status badge from then on.
Why it matters
No retyping customers that already exist in your books — and no duplicate customers when you invoice.
Step 4 of 5Customers
Portal access: usually automatic
Most customers never need a login: every quote and proof email carries a one-click link into your branded portal, scoped to that one job. The ticket's Copy portal link button gives you the same link to paste anywhere.
app.printcore.ai/customers
What to do
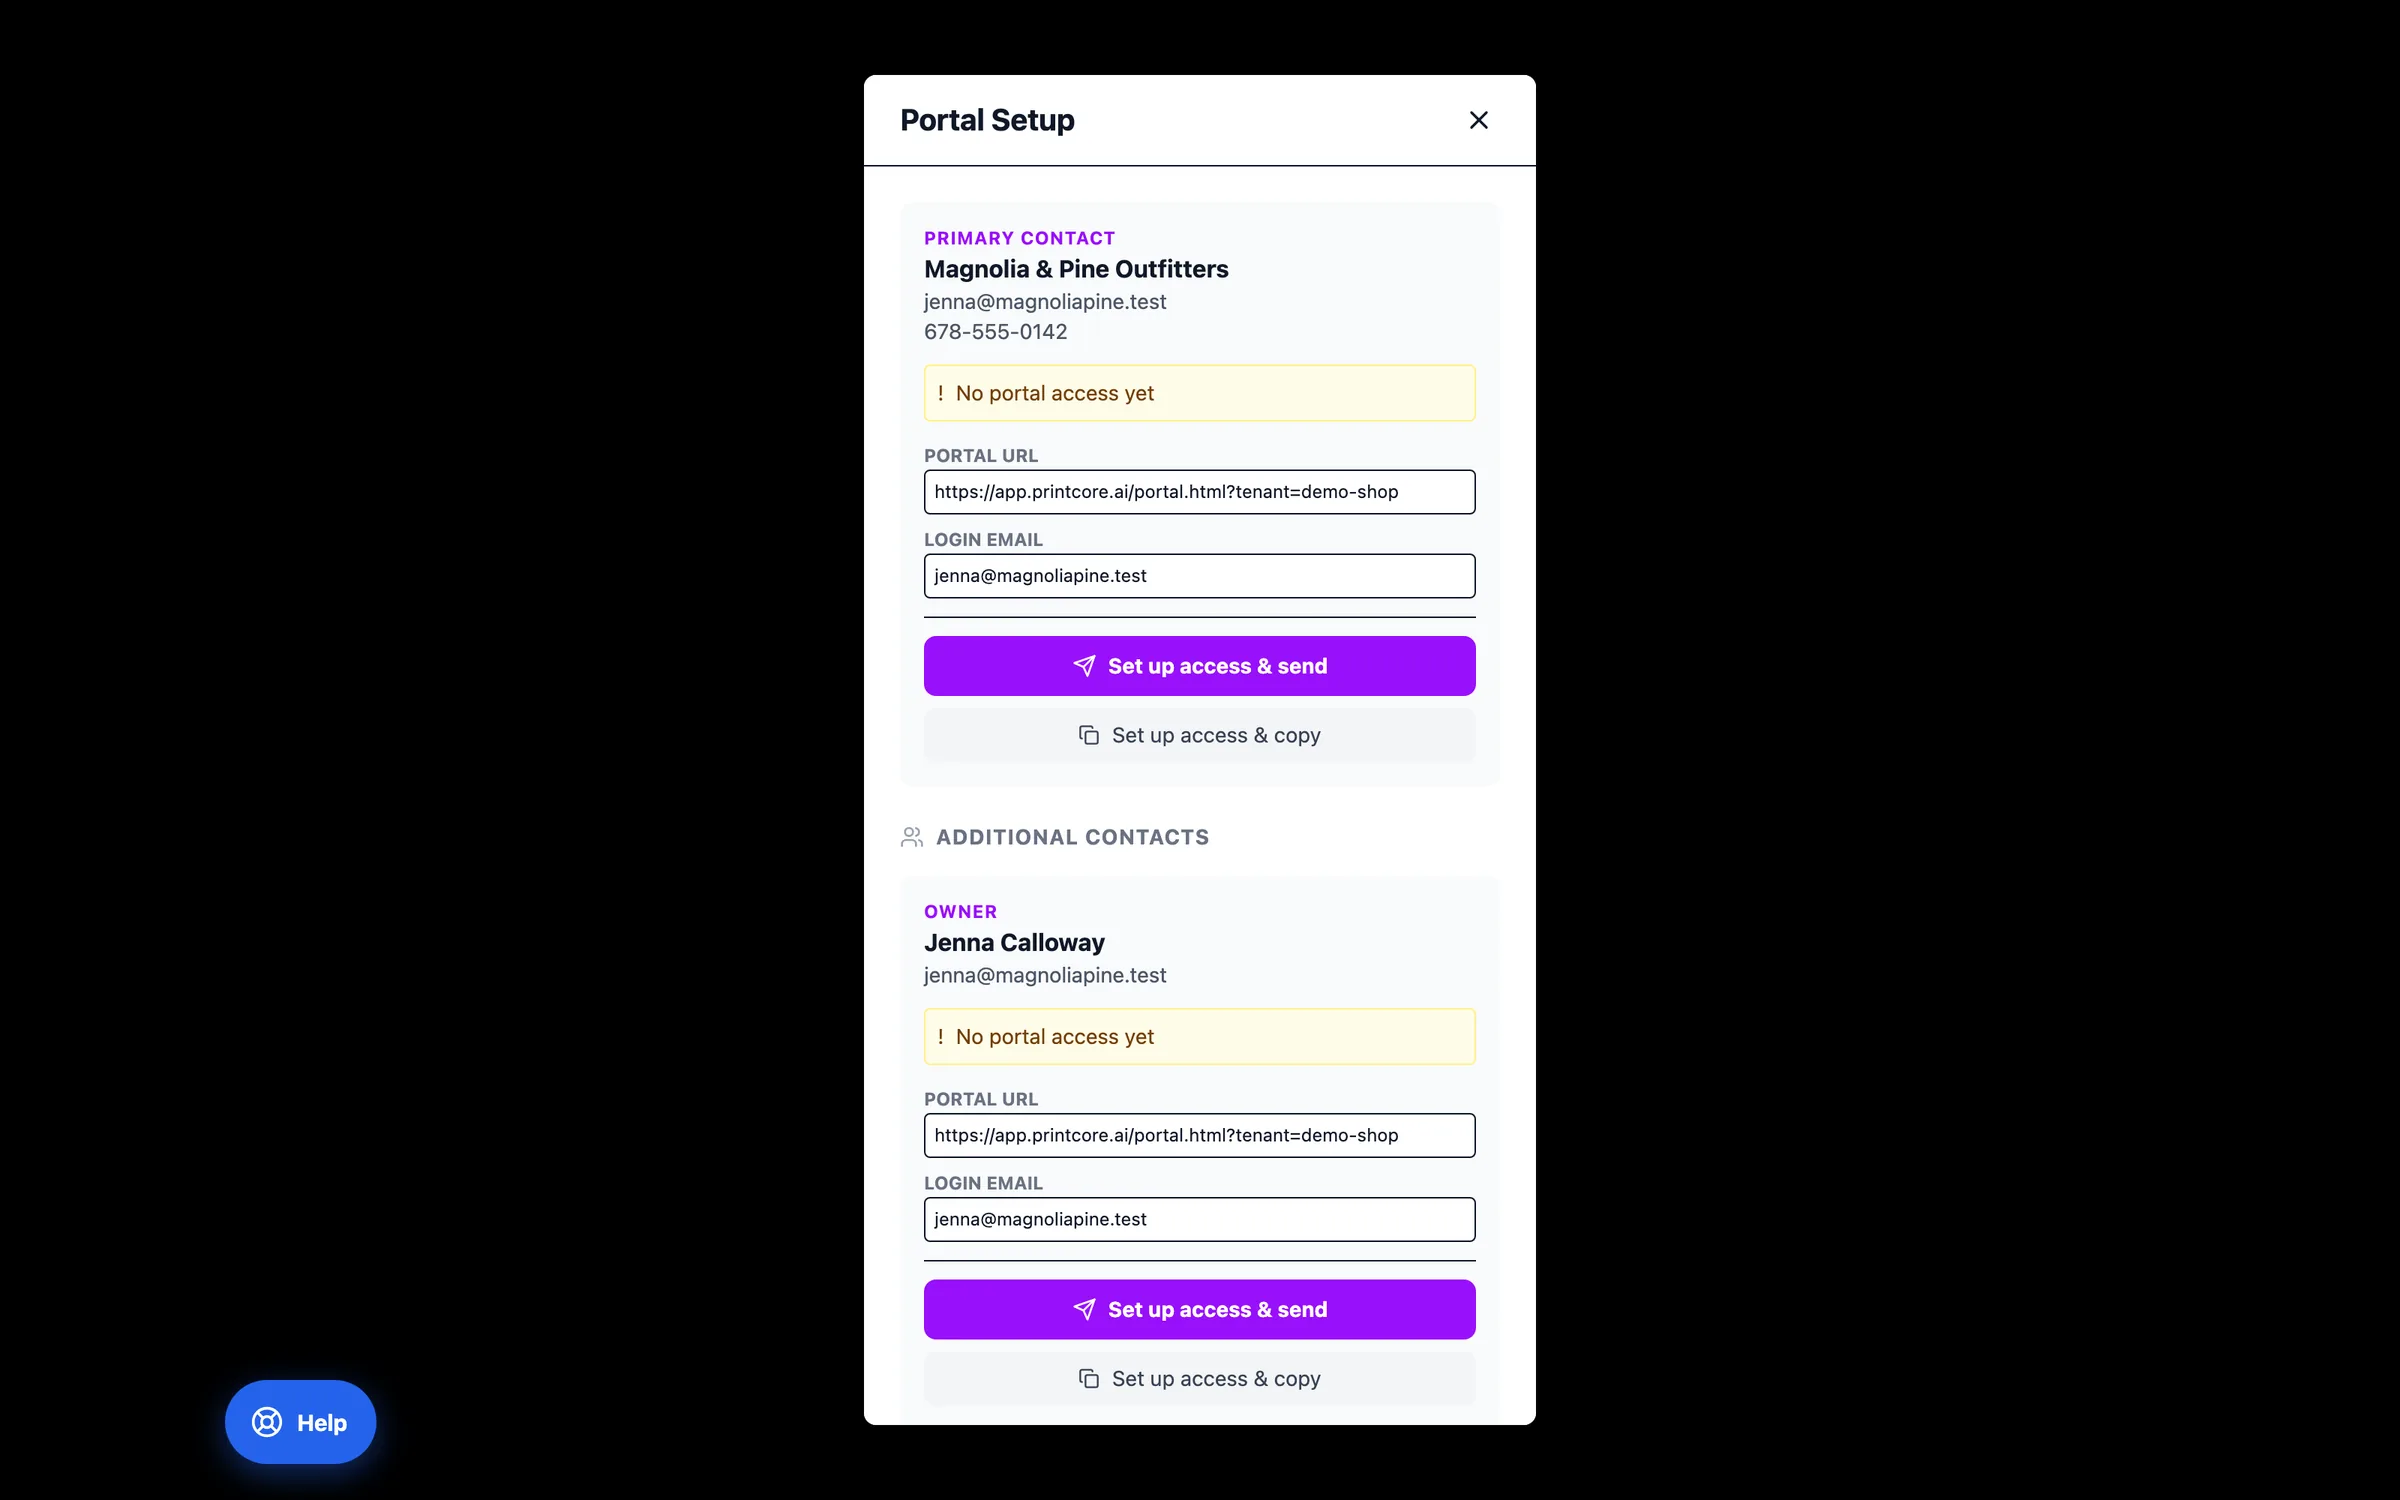
For a customer who wants standing access to all their jobs, click Portal on their record (or on a specific contact), and choose Set up access & send or Set up access & copy. The new access code is shown once and never stored in readable form.
Why it matters
Less back-and-forth on proofs and reorders. Customers approve from the email; you're not the bottleneck for status questions.
Customers, organized 👥
Next, see what your customers see when they open a quote — the Customer Portal.